Yamaha RX-V675 Repair: Fixing a Dry Solder Joint With a Paint Stripper
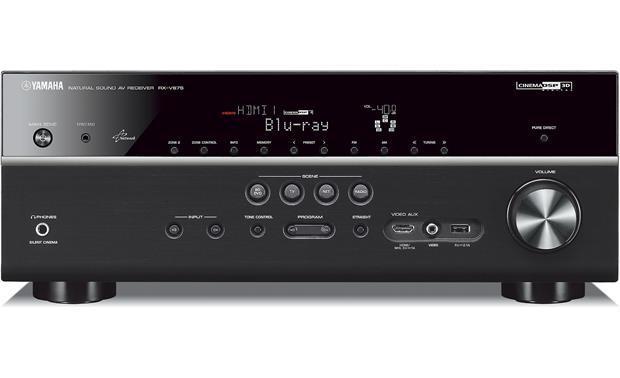
My Yamaha RX-V675 receiver started cutting out on cold mornings. No sound on startup, then pops and crackles for twenty minutes before it would work. Turned out to be a dry solder joint, fixed with a hairdryer, a bag of ice, and a Ryobi heat gun.
My roughly five year old Yamaha RX-V675 receiver started playing up, and I was not looking forward to a costly replacement. So I decided to attempt a repair.
The Symptoms
The failure looked like this:
- No sound when turning on
- After a few minutes, sound would cut in then cut out with a pop
- The sound would stay on for longer each time
- It would take about twenty minutes before the sound would stay on permanently
- The issue occurred on all inputs, including AirPlay, so it seemed to be on the output side internally
The fact that it took time to start working pointed me in the direction of a dry solder joint. This is when either from a manufacturing defect or from overheating, the solder breaks away from the connection. The break reconnects when the area heats up again through thermal expansion. Cold start, no connection. Give it time to warm up, connection restored. Classic behaviour.
Opening It Up
The first step was to open the case and check the board. There were no burn marks, no corrosion, and no bulging capacitors, so once again it made me think dry solder joint. If a capacitor had gone, you’d usually see physical signs of it.
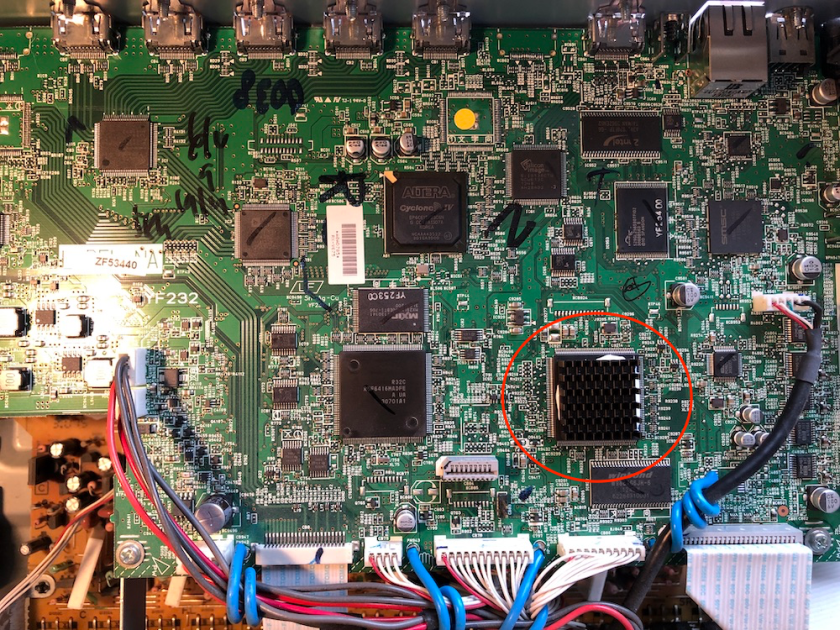
The system has two sections. One appears to be the digital side on the top board, and the analogue amplification board sits below. The connections on the lower board were beefy and I thought it was unlikely to be one of those. A dry joint on a heavy gauge connection is rare compared to the finer work on the digital side.
Finding the Culprit
The next step was to turn the box on and go over the board with a hairdryer. This quickly warms the components and lets you see which one is the likely culprit. Having seen many chips with this sort of issue, I focused on those first.
This particular board has about eleven larger chips. Going through them one by one with the hair dryer, I found that when I hit the bottom right corner, the audio came on.
I was lacking a can of freeze spray, so I improvised with a snaplock bag of ice. Placing this on the board over the area, the sound cut out again after a few seconds. Back again with the hair dryer, I managed to narrow it down to one chip.
So now I knew which chip it was, I knew it was heat related, and I was 99% sure it was a bad solder joint.
The Reflow
The next step was to reflow the solder. Normally you would use a specialised heat gun to achieve this, but unfortunately I don’t have one. The other option is to put the board in an oven, but you risk damaging parts, melting things, and the capacitors need to be removed first or they can explode.
With an infrared thermometer I thought maybe, but unlikely, I could get the hair dryer hot enough. It only reached about 80°C, well below the required temperature for reflowing solder.
Next I tried my wife’s craft heat gun. Better, but still only 110°C.
I was running out of options, but then I remembered I have a Ryobi heat gun used for paint stripping. This did the trick. I was able to carefully bring the temperature up to 240°C, keep it there for a few seconds, then let it cool down slowly.
The Moment of Truth
After waiting about thirty minutes it was back down to around 20°C. There were three possible outcomes: totally dead, same issue, or it worked.
The machine powered up. Audio.
It wasn’t dead, which was the main thing. I powered it off again and cooled it further with the ice bag to below 20°C. Powered it up again. Audio.
Before putting the top back on, I added some heatsink compound and a small heatsink to the affected chip. It had obviously overheated at some stage, so I’m hoping a small amount of heat dissipation will help prevent this from happening again.
The Real Test
The last test was to wait until the next morning. The cold mornings of the coming winter was what made this issue first apparent. Over the summer it had been fine, so I’m not even sure when the fault actually occurred.
After a good sleep, happy with my achievement, I woke up in the cold and hit the power button. There was that short delay when it turns on that had me waiting with anticipation.
It worked.